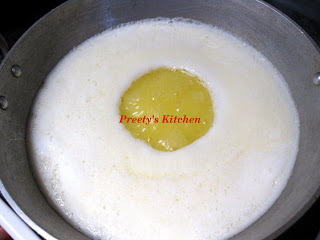
 Ghee (clarified butter) is made by heating butter until it melts and turn into golden colored liquid. It is used in most of the Indian dishes. It adds fragrance and richness to dishes.
I usually buy four pack unsalted butter from Costco and use 3 of them to make ghee. It is much cheaper and tasty than store bought. It makes every dish more flavorful.. It comes with good shelf life so can be stored at room temperature in air-tight containers.
Some pics from my best friend Swati's first Varalakshmi Pooja.
Ingredients:-
Unsalted Butter
Procedure:-
1) Take a large pan or kadai and add butter.


 4) The scum will become golden brown in color and you can see the clear ghee with a nice aroma, (but always keep an eye on it while preparing as the ghee should be golden brown in color . If it starts turning dark then it means you are overdoing the process and stop)
5) Remove the ghee from the heat and let it cool..
6) After its cool down , strain the ghee thorugh strainer in a air tight container.Ghee will solidify when cooled.
Ghee can last upto 6 months
Notes: Making Ghee is very easy and simple..But takes lot of time. Do not fasten the process by increasing the heat, the ghee needs to be slow cooked...it takes about 45 minutes to an hour..so be patient:)
After transferring the ghee to other container there is still some ghee left in the pan so you can do two things:-
1) My mom always use to put about 2-3 cups of whole wheat flour in the same pan and cook till light brown..alongwith the solid particles left at the end.
2) Or you can remove the solid particles with a spoon and use the pan to cook any sabzi or dal..
So now you know how to make a homemade desi ghee, if you haven't tried it yet, then give it a try, step by step pics are included to follow the process easier..Enjoy:)
How To Make Homemade Ghee
Subscribe to:
Post Comments (Atom)


18 comments:
Wow Preethi,thanks for the one by one picture..looks so much a sound way of making pure ghee..
pooja pictures look divine too..
my mom used to to make ghee at home., but i never learned to make it..it sounds simple ..am going to do it next time..
very nicely explained preety ! i needed this !
Thanks dear for this detailed pics.
Nice pictures Preety, even I used to make ghee like this, hey if you want you add a sprig or 2 of drumstick leaves in the end after switching off the stove, remove the stems after 10 minutes, this way the ghee tends to be even more flavorful.
In india its a lengthy process..but here its easy to make ghee at home..isnt it??? I liked the color of your ghee, sometimes mine turn a little more brown..will try to make like yours next time.
Good job preeti,nice to know that butter can be done into homemade ghee.Liked the pic of the process of making ghee :)
Gud post Preety...and the pics looks so divine
Very helpful! we always make homemade ghee using the malai from the milk, never made with butter though, will try sometime
Very good post and very helpful.
Happy Ganesh Chaturthi...
Hi Preety, thanks for stopping by my blog and for your lovely comments dear. U too have a great blog with interesting recipes. U very well explained to make clarified butter. Keep in touch, will be frequently visiting:)
I too love home made ghee..awesome taste and smell ...nice pooja pictures too.. divine.Happy ganesha chaturthi too..
I am always used to buying ghee. but i remember my mom making them out of butter. yours look perfect. and thanks for stopping by my blog
I liked your blog very much. I appreciate for your beautiful presentation of preparing ghee.
You are welcome in my blogs.
Hi preety,
after a long time i am visiting here...hru and ur kid?
pics luk so nice..
Nice clicks.. u have a great recipes..
I use the same method but I stir continuously to greatly minimize the brown stuff (which we call "beri" ) that accumulates at the bottom of the pan.
Post a Comment